


 Server
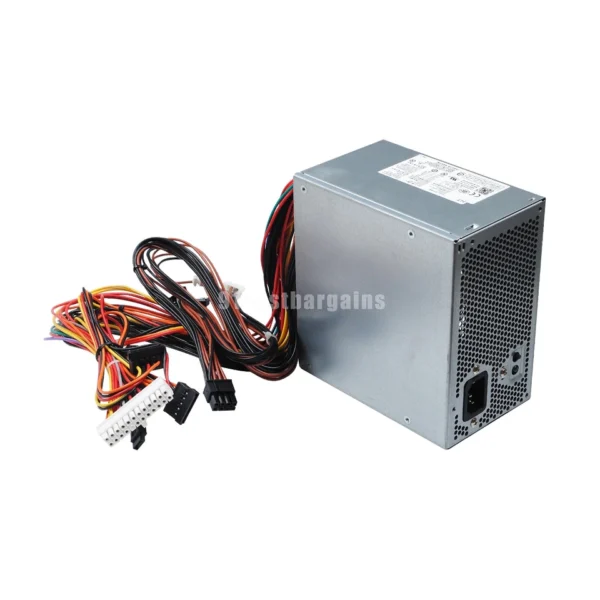
Max Power: 475W
Input: 100-240V~10.0A, 50/60Hz
Output: +5V / 18.0A
+3.3V / 16.0A
+5Vsb / 2.5A
-12v / 0.3A
+12V1 / 16.0A
+12V2 / 12.0A
+12v3 / 16.0A
Connectors
(1) 24-Pin ATX Connector (14″)
(1) 6-Pin PCI-E Connector (22″)
(1) 8-Pin (13″)
(1) 8-Pin (6+2) (21.5″)
(5) SATA Connectors (6″ and 9″ on the same cable) (11.5″ and 13.5″ and 16″ on the same cable)
Hurry and get discounts on all Apple devices up to 20%
Sale_coupon_15
KSh7,500.00 excl. VAT
Payment Methods:
The Dell XPS 9100 power supply is the core component that drives stable performance in this high-end desktop. Built for multitasking, creative work, and gaming, this PC demands a powerful and efficient PSU to match its performance standards.
The power supply unit inside the XPS 9100 supports high-wattage output to handle intense tasks and multiple components. Key specifications include:
Wattage: 475W or 750W (depending on configuration)
Connector Types: 24-pin ATX, 8-pin CPU, SATA, PCIe
Input Voltage: 100–240V AC, auto-switching
Efficiency Rating: 80 PLUS certified (on most models)
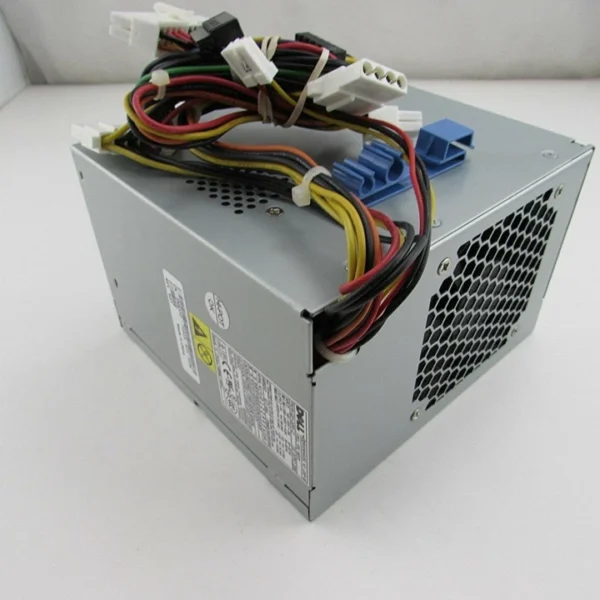
Dell used both standard ATX and proprietary units, so double-check before purchasing a replacement.
If your XPS 9100 desktop shows any of these symptoms, your PSU may be the culprit:
Random restarts or shutdowns
System won’t power on
Burning odor from the case
No response when pressing the power button
Fans spin but no display output
Quick action can prevent damage to the motherboard or GPU.
Replacing the power supply is a manageable task if done carefully. Follow these steps:
Turn off the PC and unplug the power cord.
Remove the side panel of the case.
Disconnect all power cables from the motherboard, GPU, and drives.
Unscrew the PSU from the case.
Take out the old unit and install the new one.
Reconnect all cables securely.
Close the case and test the power.
Make sure the new PSU has enough wattage for your components, especially if you have a high-end GPU.
When shopping for a replacement, choose a PSU that matches these features:
ATX form factor (check your case for space)
80 PLUS Bronze or better efficiency
Sufficient wattage for your CPU and GPU
Reliable brand (Corsair, EVGA, Seasonic, or Dell OEM)
You can find these on Amazon, Newegg, and direct from Dell.
The XPS 9100 is a performance-oriented desktop, and the PSU is the foundation of that performance. A high-quality PSU prevents instability and protects your hardware. Especially if you’re upgrading components like the GPU, a higher-wattage PSU is a must.
Protect your investment and avoid early PSU failure with these habits:
Clean dust from vents and fans regularly
Use an uninterruptible power supply (UPS)
Don’t daisy-chain high-power devices
Monitor temperatures and airflow inside your case
Preventive care reduces system stress and power-related failures.
The Dell XPS 9100 power supply is more than just a component—it’s the engine behind your system’s stability. Whether you’re replacing a failing unit or upgrading for better performance, choose a reliable, efficient PSU. A strong power foundation keeps your desktop powerful, safe, and future-ready.
No account yet?
Create an Account


 ASUS
ASUS