


 Server

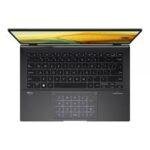
Form Factor: Slim chiclet style with 6‑row layout.
Key Travel: ~1.3 mm for accurate and comfortable typing.
Illumination: non‑backlit configuration.
Connector: Flat ribbon with gold contacts, locked via ZIF mechanism.
Mounting Method: Integrated into the top cover/palm rest for rigidity.
Spill Protection: Internal membrane layer protecting mainboard components.
Installing this OEM keyboard restores the laptop’s original feel, precision, and aesthetic integrity.
Hurry and get discounts on all Apple devices up to 20%
Sale_coupon_15
KSh3,700.00 excl. VAT
Payment Methods:
At Lansotech Solutions, we are recognized as the leading Lenovo laptop repair and parts provider in Nairobi. If your Lenovo IdeaPad 530S series or C340 series keyboard is failing—whether due to liquid damage, worn keys, or unresponsive circuits—this comprehensive guide provides the exact steps and technical details for a proper replacement using genuine Lenovo keyboards.
This guide applies to the following models, which use similar upper‑case integrated keyboards:
Lenovo IdeaPad 530S‑14ARR
Lenovo IdeaPad 530S‑14IKB
Lenovo IdeaPad 530S‑15IKB
Lenovo IdeaPad C340‑14API
Lenovo IdeaPad C340‑14IML
Lenovo IdeaPad C340‑14IWL
Each of these laptops features a slim ultrabook‑grade keyboard built into the palm rest assembly.
Layout: Low‑profile, island‑style chiclet keyboard with six rows.
Key Mechanism: Precision scissor switches with approximately 1.3 mm travel.
Backlight Options: Available in non‑backlit and white LED backlit variants (verify FRU).
Connector Type: Flat Flexible Cable (FFC) with ZIF (Zero Insertion Force) locking.
Mounting: Integrated into the top cover/palm rest, secured with plastic rivets or screws.
Design: Ultra‑thin design optimized for convertible and slim chassis.
Durability: Built with a sealed membrane for spill resistance.
Precision Phillips #0 / #00 screwdrivers
Torx T5 driver for bottom screws
Plastic pry tools and spudgers
Fine tweezers for ribbon cable handling
ESD wrist strap and anti‑static mat
Replacement OEM Lenovo keyboard assembly (confirm FRU before ordering)
Power off the laptop completely.
Unplug the AC adapter and remove all external devices.
Press and hold the power button for 10 seconds to drain residual electricity.
Invert the laptop and remove all T5 screws securing the lower cover.
Use a plastic pry tool to carefully release the side clips.
Lift the base cover to expose the internal components.
Locate the main battery connector on the system board and unplug it to prevent accidental shorts during disassembly.
For these models, the keyboard is part of the top case:
Remove the system board, speakers, and any internal cables attached to the palm rest.
Carefully disconnect the keyboard ribbon cable and touchpad cable from the motherboard.
From the underside of the palm rest, release plastic rivets or tiny screws holding the keyboard in place.
Gently push the keyboard out of the frame.
Detach the flat ribbon cable from the ZIF connector.
Position the new keyboard into the palm rest frame.
Secure it using the specified screws or replacement rivets as per the Lenovo hardware maintenance guide.
Slide the ribbon cable into the ZIF connector and lock it.
Reinstall all internal components in the correct order, routing cables exactly as before.
Reconnect the battery.
Fit the base cover back and tighten all screws.
Power on the laptop.
Test all keys including function keys, arrow keys, and backlight toggle (Fn + Spacebar).
Verify that the keyboard responds uniformly.
Authentic Lenovo spare parts directly sourced and fully tested.
Skilled technicians experienced with ultrabook and convertible models.
Fast turnaround times with a focus on quality and detail.
Warranty-backed service giving you complete peace of mind.
No account yet?
Create an Account


 ASUS
ASUS