


Hurry and get discounts on all Apple devices up to 20%
Sale_coupon_15
KSh3,500.00 excl. VAT
Payment Methods:
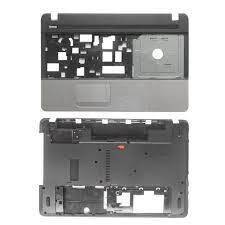
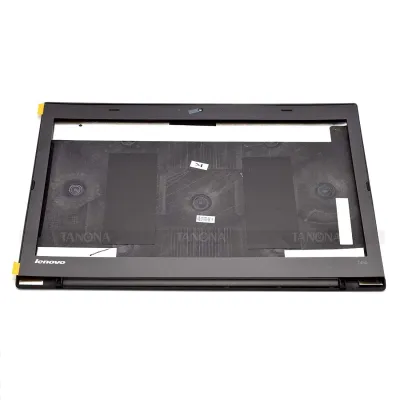
If you own a Lenovo T440 laptop, you might one day face the need to replace its palmrest or bottom base casing. These parts are important because they protect your laptop’s internal parts and provide a good place to rest your hands while typing. In this blog, I will explain how you can replace the palmrest and the bottom base casing of your Lenovo T440 in a simple and easy way. You don’t have to be an expert; I will keep it clear so even young learners can understand.
Before we dive into the replacement process, let’s understand what these parts do.
Palmrest: This is the area where you usually rest your palms when typing. It includes the touchpad and sometimes the fingerprint scanner. Over time, it can get scratched, cracked, or loose.
Bottom Base Casing: This is the hard shell at the bottom of your laptop. It protects the internal parts like the battery, motherboard, and cooling system. If it gets damaged, your laptop may be vulnerable to dust, dirt, and drops.
Replacing these parts can make your Lenovo T440 look new and protect it better.
There are several reasons why you might want to replace these parts:
Physical Damage: Cracks or breaks caused by drops or accidents.
Wear and Tear: After years of use, the palmrest may get sticky or discolored.
Improved Feel: Sometimes, a new casing can make your laptop feel more comfortable.
Fixing Internal Issues: Damaged casing can affect internal parts, so replacement helps maintain laptop health.
To replace these parts, gather the following simple tools:
Small Phillips-head screwdriver
Plastic opening tools or a spudger
Tweezers (optional but helpful)
Anti-static wrist strap (recommended to protect your laptop from static electricity)
A clean workspace with good light
First, make sure your laptop is completely turned off. Disconnect the charger and any other cables.
Flip your laptop upside down and remove the battery. This step is important for safety.
Use the Phillips screwdriver to remove all the screws from the bottom base casing. Keep them safe because you will need them to put the casing back.
Carefully use a plastic opening tool to pry open the bottom casing. Work gently around the edges until it comes off. Avoid using metal tools to prevent scratches.
Inside, you will see cables connecting the palmrest to the motherboard. Gently unplug these cables using your fingers or tweezers.
Remove the screws holding the palmrest in place.
Lift the palmrest carefully from the laptop body. If it feels stuck, check for any cables still connected.
Place the new palmrest in position. Screw it down firmly but not too tight.
Reconnect the palmrest cables to the motherboard.
Put the bottom base casing back and screw all screws tight.
Finally, put the battery back in and turn on your laptop. Check that the touchpad and keyboard work well.
Replacing the bottom base casing is simpler if you have already removed the palmrest. Here are the steps:
Remove all screws on the bottom base casing.
Pry open the casing carefully.
Take out the old bottom base casing.
Place the new bottom base casing on the laptop.
Screw all screws back to secure it.
Get the LENOVO T440 CD casing from Lansotech Solutions today
No account yet?
Create an Account