


 Server
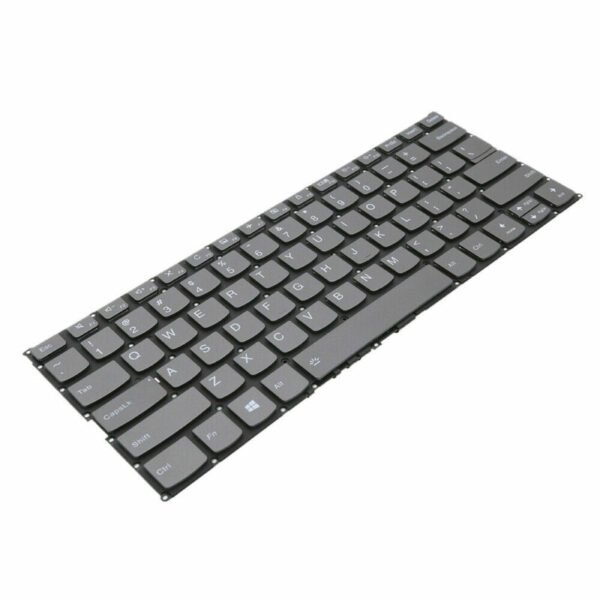
The Lenovo ThinkPad E15 Gen 2 replacement keyboard is an OEM Field Replaceable Unit engineered for durability and performance:
Type: Full-size spill‑resistant keyboard
Layout: Standard US/UK/EU variations with dedicated numeric function keys
Key Travel: 1.5 mm optimized for tactile feedback
Connectivity: Flexible printed cable with gold‑plated contacts
Compatibility: Designed exclusively for Lenovo ThinkPad E15 Gen 2 (20T8, 20T9 series)
Engineered with high-durability membranes and precision-molded keycaps, this keyboard meets Lenovo’s rigorous reliability standards, ensuring long-term service life and optimal typing comfort.
Hurry and get discounts on all Apple devices up to 20%
Sale_coupon_15
KSh3,200.00 excl. VAT
Payment Methods:
At Lansotech Solutions, we specialize in professional Lenovo ThinkPad E15 Gen 2 keyboard replacement services. As trusted laptop sellers and repair experts in Nairobi, our technical team follows industry‑standard procedures to ensure your device regains its original performance and reliability. Below is a detailed technical breakdown of the keyboard replacement process, required tools, and specifications.
The Lenovo ThinkPad E15 Gen 2 utilizes a spill‑resistant, backlit chiclet‑style keyboard integrated into the upper case assembly. This keyboard is secured to the chassis with multiple screws and metallic retention brackets. It connects to the system board via a low‑profile flexible printed cable (FPC) with a zero‑insertion‑force (ZIF) connector.
Key technical features:
Layout: Full‑size, 6‑row, island‑style keyboard with function keys (F1–F12).
Backlight: Single‑zone white LED backlight with two brightness levels.
Interface: FPC ribbon cable with integrated grounding pads.
Compliance: Fully compatible with Lenovo FRU (Field Replaceable Unit) specifications.
To ensure a precise and damage‑free replacement, we use the following professional‑grade tools:
ESD‑safe screwdriver set (Phillips PH0, PH00, and Torx T5 bits).
Plastic spudger set for prying without chassis damage.
ESD wrist strap and grounded mat to prevent electrostatic discharge.
Magnetic screw organizer to track and separate screws by size.
Tweezers for handling delicate ribbon connectors.
Original Lenovo ThinkPad E15 Gen 2 keyboard FRU (recommended FRU: 5N20T45267 or region‑specific variant).
Shut down the laptop, disconnect the AC adapter, and remove all peripheral devices.
Remove the primary battery if accessible.
Hold the power button for 10 seconds to discharge residual power.
Using a Torx T5 driver, remove the perimeter screws securing the bottom cover.
Utilize a plastic pry tool to release the hidden clips and lift the cover to expose internal components.
Before any internal work, detach the main battery connector from the motherboard to eliminate power flow to the keyboard circuits.
Locate the keyboard FPC near the center of the mainboard. Unlock the ZIF latch gently using tweezers or a spudger and slide out the cable.
Access the underside of the palm rest assembly and locate the keyboard retention screws marked with a keyboard icon (⎙). Remove them carefully.
Flip the laptop upright and open the display at a 90‑degree angle.
Use a plastic pry tool along the top edge of the keyboard to release the retaining clips.
Lift the keyboard gently from the top, taking care not to stress the ribbon cable.
Position the new Lenovo ThinkPad E15 Gen 2 keyboard into the top case, aligning all retention points.
Reconnect the FPC into the ZIF connector and lock the latch securely.
Reinstall the retention screws from the underside.
Reattach the bottom cover, reconnect the battery, and power on the device.
Perform a full key matrix test, including backlight levels and function keys, to confirm proper operation.
Keystroke Recognition Test: Verify every key registers correctly using built-in diagnostics.
Backlight Verification: Test all backlight levels for uniform illumination.
Firmware Compatibility Check: Ensure BIOS recognizes the keyboard without error codes.
Final Mechanical Inspection: Confirm no flex, misalignment, or loose fittings.
Genuine Lenovo FRU parts sourced directly from authorized distributors.
Certified repair engineers trained on ThinkPad hardware architecture.
High-precision tools to avoid board or chassis damage.
Warranty coverage on parts and labor for total peace of mind.
Fast turnaround service with same-day or next-day delivery.
No account yet?
Create an Account


 ASUS
ASUS