




 Laptop Computers
 Desktop Computers
 Printers
 Network
 Software
 Laptop Accessories
 Laptop Components
 Office
 Desktop peripherals

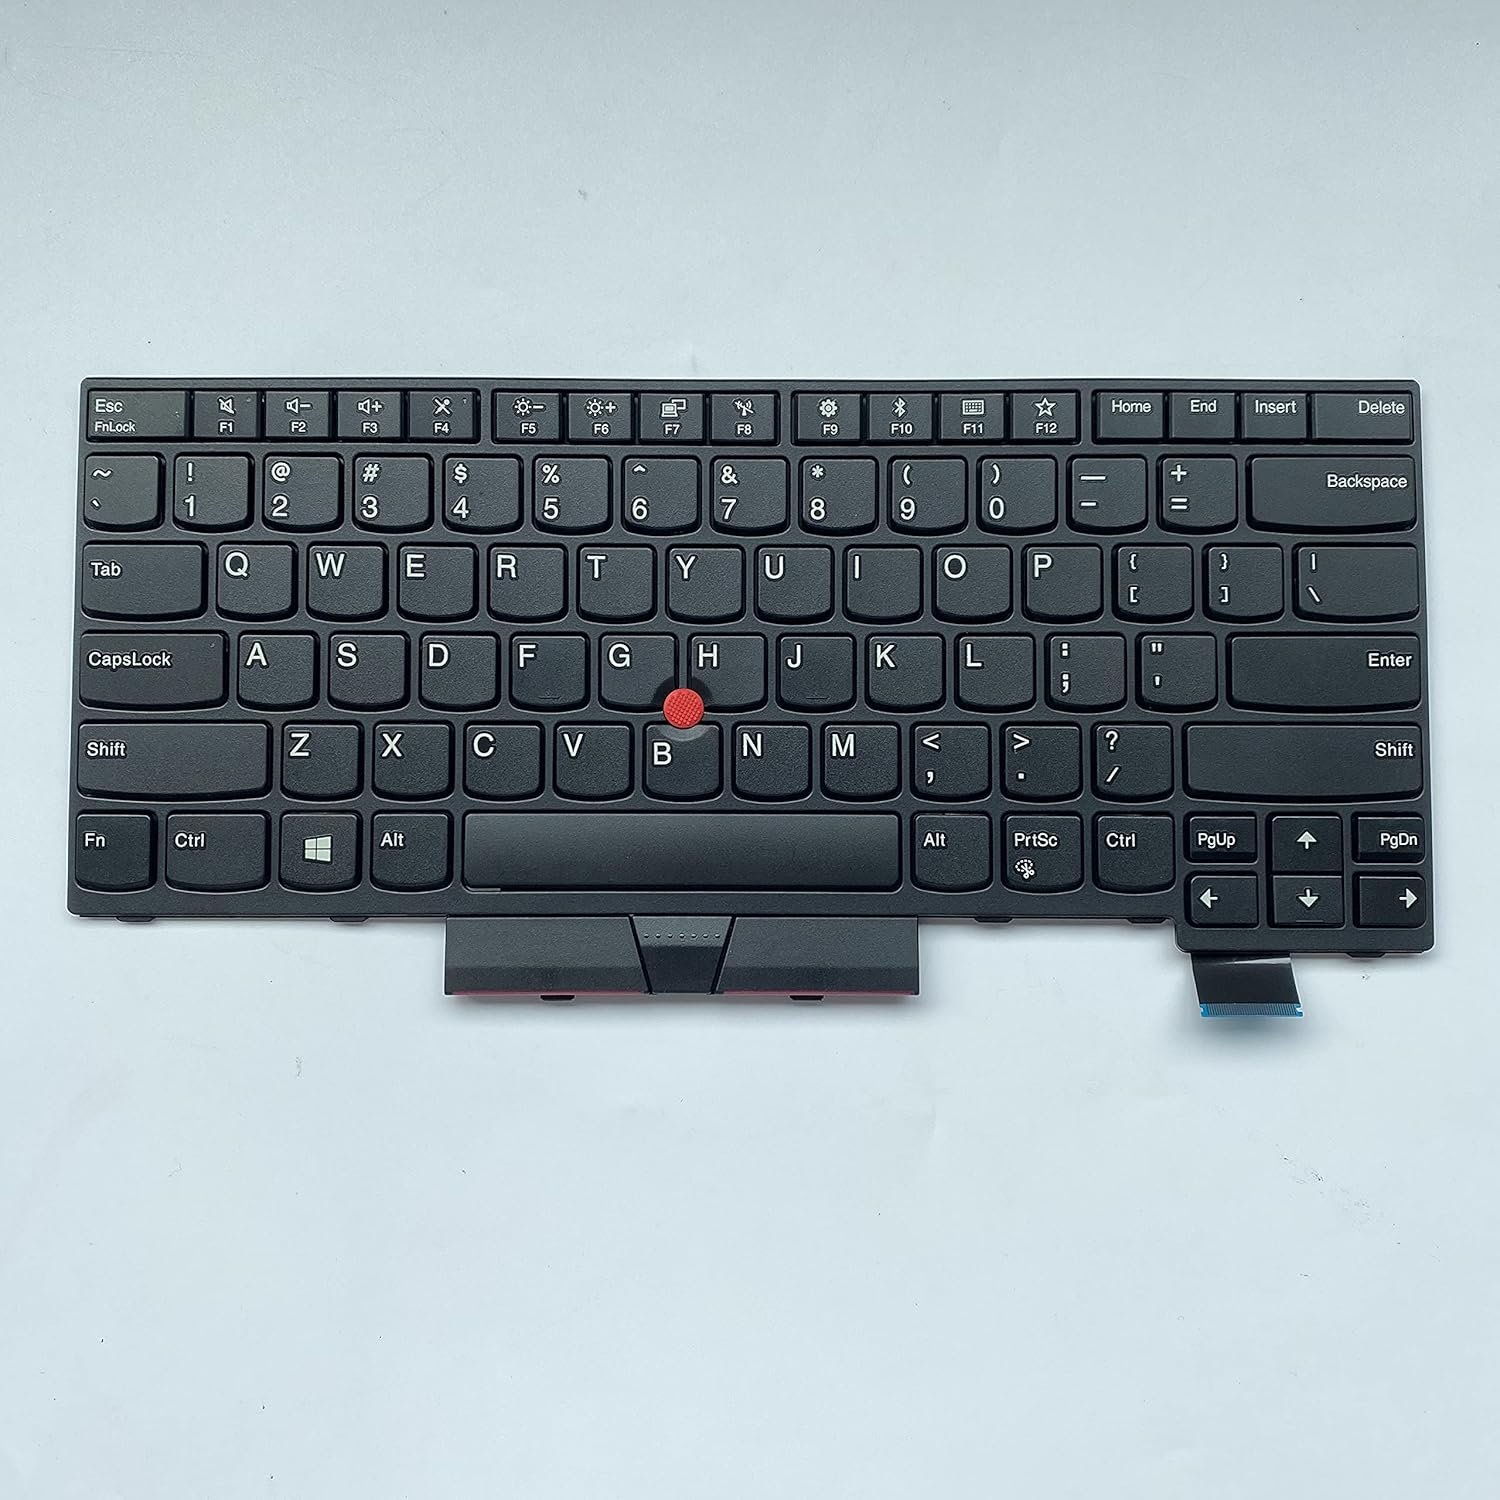
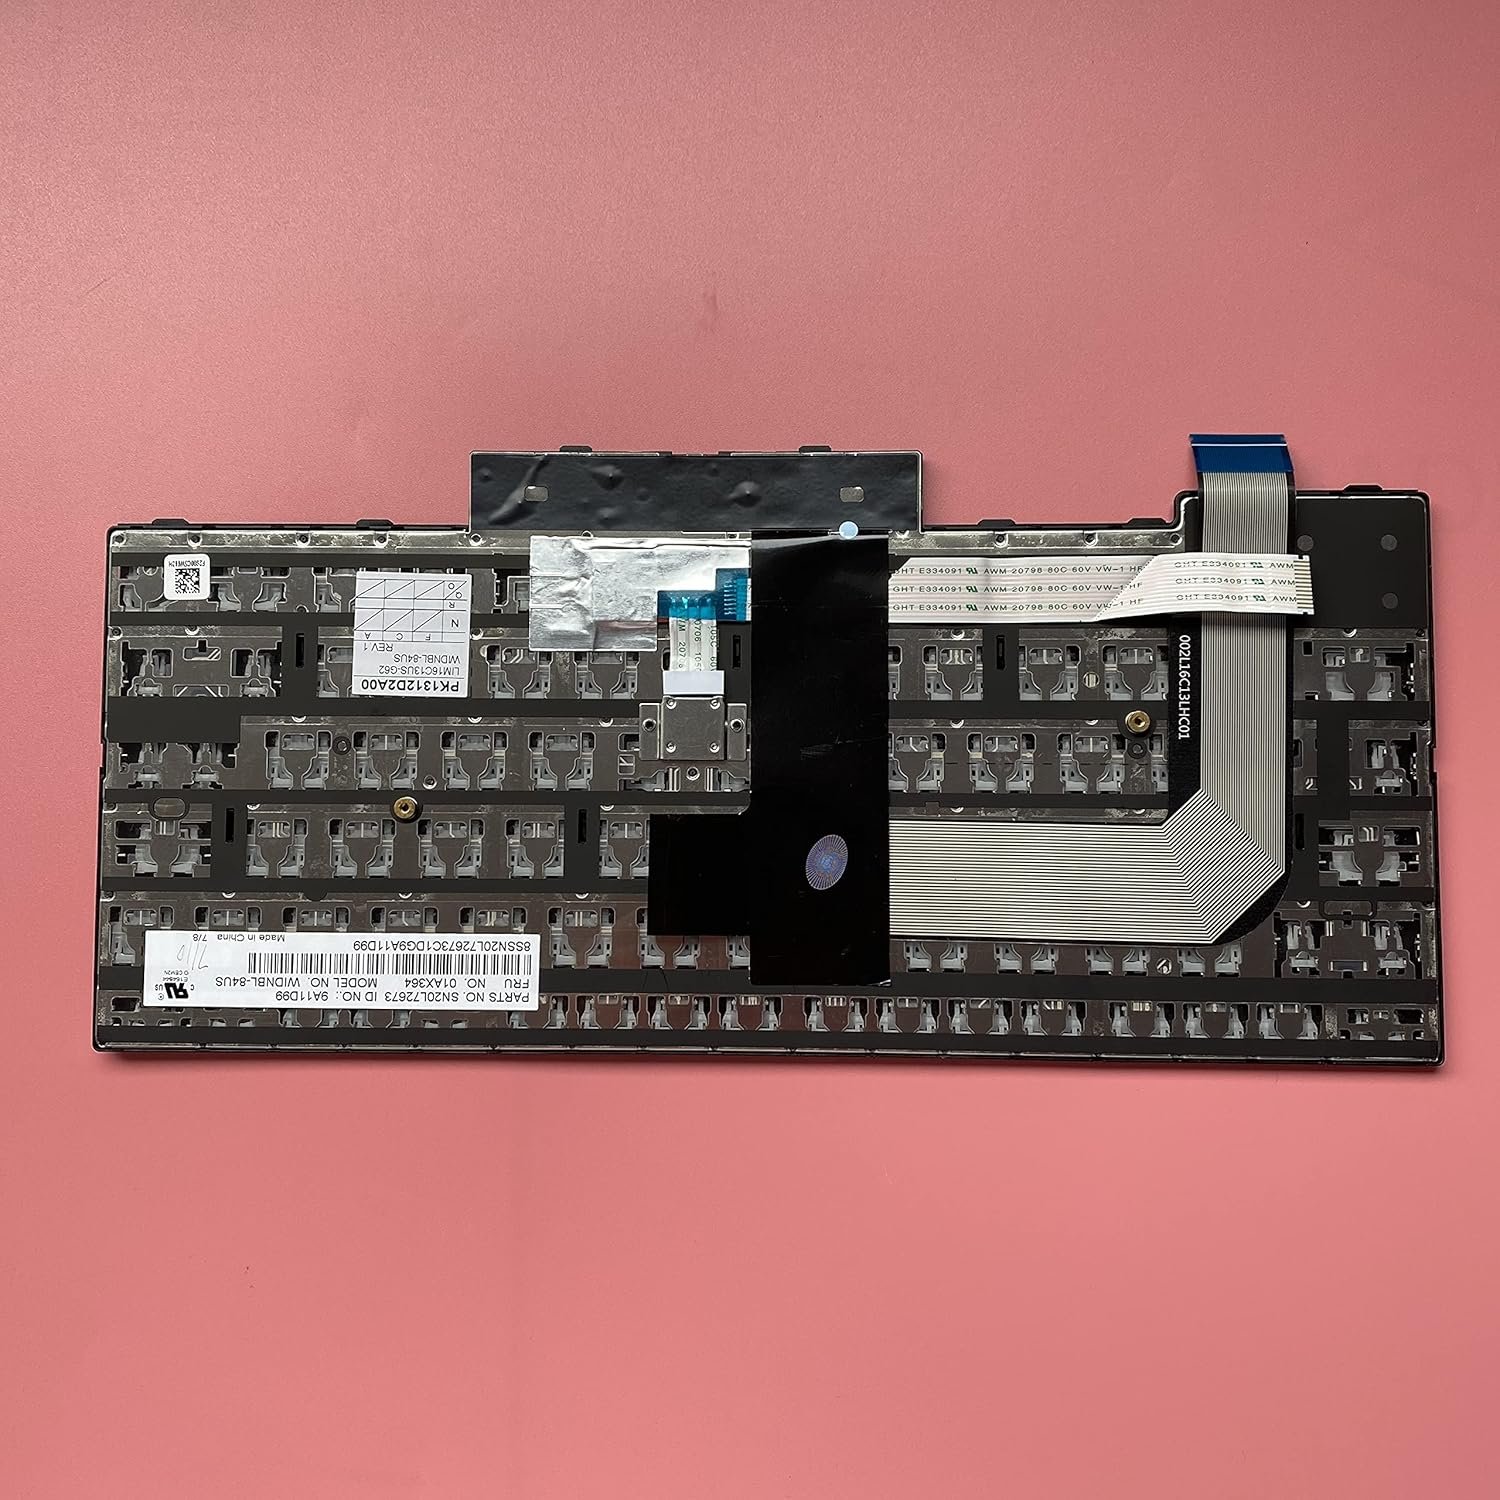
The Lenovo ThinkPad replacement keyboard is a genuine OEM assembly engineered for the T‑series and A‑series business laptops:
Type: 6‑row chiclet, with TrackPoint and dedicated buttons.
Key Travel: Approx. 1.8 mm, scissor‑switch precision.
Connection: FFC with gold‑plated contacts and ZIF lock.
Compatibility: Exact fit for T470, T480, A475, A485 models.
Durability: Spill‑resistant multilayer membrane, reinforced keycaps, and Lenovo’s tested long‑life mechanism.
Replacing with this genuine Lenovo keyboard restores your device to factory-standard typing performance and ensures reliability for years.

Hurry and get discounts on all Apple devices up to 20%
Sale_coupon_15
KSh4,500.00 excl. VAT
Payment Methods:

At Lansotech Solutions, we are renowned for providing professional Lenovo keyboard replacement services in Nairobi. Whether you own a Lenovo ThinkPad T470, T480, A475, or A485, our certified technicians ensure a precise replacement using genuine Lenovo Field Replaceable Units (FRUs) to maintain the legendary ThinkPad typing experience. Below is a detailed technical procedure that reflects our expertise.
All these ThinkPad models share a similar keyboard assembly design with slight FRU variations depending on region and features (backlit or non‑backlit).
Keyboard Type: 6‑row classic ThinkPad chiclet layout with TrackPoint and integrated buttons.
Key Travel: Approx. 1.8 mm with scissor‑switch mechanism.
Backlight Options: Available in backlit or non‑backlit variants.
Interface: Flat Flexible Cable (FFC) with ZIF connectors to system board.
Mounting Method: Secured from the underside with screws and retention tabs.
Spill Resistance: Multi‑layer membrane for protection.
Common FRU part numbers:
T470/T480 backlit: 01HX505, 01HX530
T470/T480 non‑backlit: 01HX490, 01HX495
A475/A485 series follow similar part numbers, always verify by serial.
Precision screwdrivers: Phillips #0/#00 and Torx T6
Plastic prying tools or nylon spudgers
Tweezers for ribbon cable handling
ESD strap and antistatic mat
Magnetic screw tray
Genuine Lenovo ThinkPad keyboard FRU for your exact model
Shut down the laptop completely.
Unplug all cables and peripherals.
Press and hold the power button for 10 seconds.
Slide the latches and remove the removable battery pack.
Unscrew all Torx T6 screws on the bottom cover.
Use a plastic pry tool to carefully release all clips around the edges.
Lift off the cover to expose internal components.
Locate the internal battery connector on the motherboard and unplug it to prevent short circuits during service.
Identify screws with a keyboard icon embossed on the chassis.
Remove these screws completely; they secure the keyboard from underneath.
Turn the laptop over and open the lid to about 90°.
Use a plastic spudger along the top edge of the keyboard (near F1–F12 keys) to gently lift it.
Tilt the keyboard toward the palm rest area.
Locate the main keyboard FFC and TrackPoint FFC.
Unlock the ZIF connectors by lifting the locking bar.
Gently remove the cables.
Align the new Lenovo T470/T480/A475/A485 keyboard into the frame.
Insert both ribbon cables into their respective ZIF connectors and secure the locks.
Press the keyboard back into place ensuring tabs click in properly.
Reinstall the keyboard screws from the underside.
Reconnect the internal battery and refit the bottom cover.
Reattach the external battery if applicable.
Power on the laptop.
Test all alphanumeric keys, function keys, and TrackPoint buttons.
Check backlight operation if using a backlit keyboard.
Our service process includes:
Full key matrix scan to confirm every key’s functionality.
TrackPoint calibration and test for accuracy.
Mechanical inspection ensuring the keyboard is seated evenly with no flex or protrusion.
OEM parts with warranty ensuring long‑lasting performance.
Certified technicians trained on Lenovo hardware maintenance.
Fast turnaround with same‑day service options.
Comprehensive support for additional components like batteries, screens, or system boards.
No account yet?
Create an Account







 ASUS
ASUS